Showing posts with label displays. Show all posts

Saturday, October 20, 2012

A Twist on the Bottlecap Art

Though I intended to do a second bottlecap panel last year, I never got around to it.
This year, I'm committed to it--I am the advisor to the high school art club and will use their energy to make it happen!

     In the meantime, this happened.


I was there when it first occurred. The PE teacher took his empty bottle and that of the IT guy, walked up to the wall, and screwed them in. I thought it was hilarious. I thought it was even funnier how it shocked people.

     How have we never thought of this before?

Well, we have. When I first started the project, the head principal suggested I make a reverse mural wherein I cut off the screw threads from the top of bottles, attach them to a board, then have an reuseable bottlecap mosaic base. We could move the colors around, screwing and unscrewing bottlecaps to make different pictures. I've never figured out how to do it, but I think a small board would be a great extra time art center in my classroom.

The bottle installation has grown to five bottles. I would be more inclined to leave the bottles up except you can see the remaining liquid in this unclean trash. The bottlecaps were all washed before being used to remove dirt, sugar,and other germs. I'm afraid fresh liquid will turn the inside of those caps nasty.

For now, the bottles have brought a smile to many and freshness to the collaborative art.

Wednesday, September 12, 2012

Mona Lisa and Other Management Techniques

I recently read about the Mona Lisa call/response technique and being Mona Lisa ready. How perfect! My students were already hearing me say "Mona Lisa quiet" because of the noise level display but these directions were so clear, specific, and fun!

     Looks like a new poster is in order!

I didn't send this poster to the printer. Instead, I used our on-site A3 color printers. (For those of you unfamiliar with A3, it's twice the size of A4. A4 is very similar to 8 1/2 by 11.)

While I was designing, printing, and laminating, I decided to illustrate my "first grade rules."

Last year, first grade was rather large with an especially high concentration of rowdy boys. While I usually prefer rules that are broad guidelines and general principles, I found I needed some explicit instructions.

     Stay in your seat.
     Raise your hand.
     Only talk to people at your table.


I wrote these rules on the board and reviewed them at the beginning of class each week. When students violated a rule, I directed their attention back to the board before going any further. While my normal teaching style is more relaxed, this system worked to restore some order to the chaotic class.

These students are now second graders. The class has been split and a few additions were made, but I've found some of them still need the structure of those three simple rules.

I rewrote the rules on my white board during the first week of school but now I have these spiffy signs!

Each rule is a separate full-color A3 print, laminated and displayed via magnet tape on the whiteboard. I like that the rules are individual print-outs so I can separate them to focus on a specific rule or move them to another part of the board. I can even take them down entirely for an upper level class that is permitted to get out of their seats to get supplies.

In the same vein as the Art Room Noise Levels, I found examples from art history to illustrate the instructions. I searched through my AP Art History images to find appropriate works. I like that the three images I settled on are ancient, Renaissance, and non-western. I might change the image for only talking to kids at your table. I'm not thrilled with using a 3D example. In addition, I wouldn't mind something more modern or a non-western that is less influenced by colonization. If you have suggestions, comment below! For now, I'm just excited to have moved beyond Expo markers on the whiteboard.


Wednesday, August 22, 2012

Beautiful (OOPS) Bulletin Board!


It's a week into school. 9 days to be exact, but today was the start of the 2nd art classes of the year. With each class finished the introduction and oops, I spent the afternoon stapling all 115 projects onto the two bulletin boards.


I know there are differing views on exposed cork, borders, and asymmetrical displays, but I think the chaotic-overlapping-and-hanging-over-the-edge aesthetic works well for this project.

The kids were already peeking on their way to music class, searching for their oops on the board!


Saturday, August 18, 2012

Back from the printer

I have an addiction. Or three, maybe four.

     1 kuai colored paper
     double-sided tape
     custom printing (with unique fonts)

When I first got into my classroom in 2008,
I started to make posters with class expectations, character traits of the month, flavorful folds, and my name. By the time second semester rolled around, I'd realized my TA had much nicer handwriting. She became my go-to sign maker, creating character trait signs for successive years, job charts, bookshelf labels, and a bilingual color wheel.

Last year, my TA switched departments. With her handwriting out of the picture, I decided to try a new avenue for classroom displays--custom printing. It seemed only natural to enlist the local printer for art classroom needs; my graphic design projects had already made it on t-shirts, banners, posters, and mugs for the school.

Throughout the process, I loved the freedom and possibilities of creating my new class expectations digitally, and the finished product looks amazing in my classroom!


This year, I took on a few new printing projects. I decided the color wheel could use an upgrade. The laminated pieces had a few minor errors and were starting to look a little worse for wear. These posters were printed as rectangles, then I cut the edges to look like paint blobs.

I was also inspired by posters on pinterest. I loved content, but like timelines, I just wasn't quite satisfied with the designs as is. I'm quite picky. I needed them to fit in specific spots around my whiteboard and I preferred a different color scheme. Combine some new fonts (Equestria and GeoSansLight), my rainbow class colors, and a taupe-y/grey background. Ta da! New posters for my art room.


Look really carefully, to the left of the bulletin board. You can see the very narrow space that necessitated custom posters. While I was at it, I printed an extra noise level chart for the secondary art teacher and about 14 extra THINK posters for teachers at school.

I absolutely love the way the posters turned out! Thanks to pinterest for linking me up with the originals and to Theresa Gillespie and Shannon P Long for sharing their ideas.


Sunday, April 29, 2012

Weaving a Bulletin Board Backdrop

A weaving bulletin board from my first year teaching gained new attention this year when bulletin board blogs and pinterest pins brought viewers to the display.

Last week, I decided to revamp the concept for a display of 5th grade reused bag weavings.


I like the bold graphic look of the black and white checkerboard on the exposed cork.
I also love how the board is a 3-dimensional demonstration of weaving.

On the opposite board, I simply displayed some of the weavings in a staggered arrangement.


Saturday, February 18, 2012

Jian Zhi 剪纸


When I was in elementary school, my mother took art classes in the community to learn scherenschnitte. I've never tried it myself, but paper snowflakes are a family legacy, passed down to me from an aunt who has done snowflakes to represent the different twelve days of Christmas.

Now I live in China, and the art of the paper cut is still deeply tied to culture.

I would love to do a unit on the paper cut, making connections across time and throughout cultures to the designs, techniques, and cultural significance of the paper cut. Just a dream. You could easily use the medium to explore symmetrical and asymmetrical designs or positive and negative space, but symbolism, patterning, decoration, line, shape, emphasis, movement, and a host of others could apply. The image on the right is a paper cut that I designed, then digitally manipulated as part of a master's assignment during Chinese New Year last year.

Back in November, I passed on the paper cut unit that only exists in my head to my new TA. I was going to a curriculum meeting in another city and China and would be gone Monday-Wednesday. I only have elementary art Monday-Thursday, so I decided my TA would have a special week, teaching all the elementary classes with an isolated lesson of Chinese art. I had suggested calligraphy, but he preferred paper cutting. I tried to explain the big ideas, enduring understandings, and interdisciplinary connections. How I wanted them to learn the significance in the Chinese culture and relate the designs to concepts they'd been learning with me. Ultimately, it was more of a follow-the-directions lesson emphasizing fine motor skills than a cultural exploration of a medium and its use of symmetrical and asymmetrical designs. But it was a start. I don't think he was comfortable with spending large amounts of time in discussion during the lesson. Presenting images, directing conversation, and educating on the history of the paper cut in China using English. Instead, he preferred to spend the hour on art production.

The results were mixed. Many students were not able to complete the designs he prepared in the class period. And as he is new to teaching at our school, and he hasn't worked with my students, classroom management was difficult on both ends. Still it was a learning experience, especially for him.

To celebrate for Chinese New Year,
I asked him to create a display of some of the work, finished or unfinished, on the two bulletin boards in our hallway. The words were a struggle, as I insisted he cut them out of paper, not print them from a computer and staple the copy paper onto the white background. It's a board on paper cuts, so paper cut words further illustrate the concept. The English is literal translations of common Chinese New Year sayings. I wish all the paper cuts were done on the bright paper, not the pastel used in the bottom left of one board.

Otherwise, I think the boards are a festive way to display this one day venture into a traditional Chinese art form and decorate the school for Chinese New Year.


Friday, November 25, 2011

Mumtaz Memorial


I was getting bored with the board, so I changed out the Sydney Opera house for this memorial to Mumtaz Mahal. (It has been almost a month for the first display.) This board will take us through December, being on display for just about30 days by the time we break for the holidays.

I was excited to feature the Taj Mahal because it represents a different nationality in our student body (India was the country of study for our middle school students during Global Village Day) and because I just taught the structure to my AP Art History students. Lastly, it was extra cool because I rediscovered these famous landmarks cards, cut from a poster purchased this summer at my trusty standby, French Wal-mart. Less than a dollar for the poster--I love that store!

Monday, November 7, 2011

A Timely Update


The visual timeline above my board is growing each week. My art history class is now in Byzantium, so we need a few more images, but the timeline is fairly full through Constantine. It has been fun to refer back to the timeline during class lectures. Just today, after looking at Justinian portrayed as semi-divine in the mosaic from San Vitale, I asked if they could remember any other examples from art history where the ruler is portrayed as god-like. To encourage their responses, I pointed them back to the timeline (Palette of Naram-Sin, for example, is on the timeline).


I haven't used it much with my elementary students, though some images from Art is... were the first to populate the line. Still, it seems that my students are noticing the artwork. Last week, during a 5th grade discussion of facial proportions (and later, distortions), one student pointed to the timeline and asked me why the older work was more realistic, more accurate, than the later work (verism vs. the head of Constantine). A great question, and perfect as we looked at the work of Amadeo Modigliani. Why do artists draw things in an unrealistic manner? Is it that they are less skillful? Is it that people back then really looked like that? Or is there something else going on...

Saturday, November 5, 2011

Self-Portraits on Display (again)


Another year has come and gone, and so third grade has once again created collage self-portraits.

The bulletin board last year
was such a hit, both in school and on the web. This year, though, bulletin board aesthetics have been on my mind. I decided to make a slight tweak to last year's display, aligning the work in a perfect grid. I typically go for the sporadic arrangement because it is less work. My perfectionist tendencies would measure and calculate for hours to find a suitable configuration. This year, though, I stumbled upon a brilliant way to align the grid. I am sure many already do this; it must be plastered across website. But since I just this month thought through the process, I thought I would share it.


I was thinking to myself...what if bulletin boards had subtle gridlines, like the back of nice wrapping paper? It would make it so nice to arrange the work. Then I realized---I could create a horizontal center line for myself with yarn! A meter stick, some staples, and I was set. I added an extra staple at the center point of the horizontal line to know where to start with my artwork. I then proceeded to hang the work, eyeballing an equal space from the yarn and from the other work. When all was stapled, I took down the yarn and added the peek-a-boo name tags to guess which student created each self-portrait.

Now that arranging artwork on a grid is so simple, I am sure I will do it more often. I do love clean lines!


Sunday, October 30, 2011

Great Danes!

Do you know the most famous work of art by a Danish person? If you're reasonably familiar with the Danish culture, you might guess that sculpture of the little mermaid by the water somewhere. Nope.

Our school recently focused on four countries as part of our Global Village Day, taking time to learn deeply about four home countries represented in our student body. The student services personnel for elementary mentioned in passing that if I wanted to do any art lessons about Denmark, that would be great. When I finally got around to researching Danish artists, I was quite disappointed. I've studied a lot of art history in college and now teach AP Art History, but none of the names on this list of artists caught my eye. Until I saw the architects.

The Sydney Opera House was designed by a Dane!

This was just the push I needed to implement the "Architecture of the Month" bulletin board that has been floating around in my head for weeks, based on the book 13 Buildings Children Should Know. I pulled facts from the book and from the internet to create a "Did you know?" about the building. It was fun to see the Aussies at our school respond to their board, proud of their featured building. At the same time, it was great to highlight the design of Jorn Utzon, an architect from Denmark whose design beat out 232 other entries and became the iconic building of Australia.


The board is not my favorite design ever. I tried to create a design that could be updated monthly without much effort. Change out the facts, replace the building, and it's set. My TA did a fabulous job drawing the building, though it seems like it needs something more in that space. I intentionally kept that space large to focus on the building and accommodate for future buildings that might be more vertical in design, but I might tweak it in future months.


Just as I was finishing the display, two moms walked down the hallway, busy preparing Global Village Day lunch.

An Aussie and a Dane.

Thursday, September 8, 2011

Design Challenge

Just over a year ago, the art department purchased a DSLR. Yet it was only last week that I discovered I could now take pictures of my whole bulletin board straight on---not at an angle from down the hall! Guess I should have tried that sooner. The hall was too narrow for my old point and click, and while there's some curvature to these pictures, I'll take it any day over the demonstration of one-point perspective in my previous bulletin board pictures.

This project was based on a design challenge seen at the Briargrove Elementary Art Page. My students could only use our school initials, ISQ, to create an interesting composition. We talked about how to create variety with only three elements through repeating, enlarging, overlapping, cropping, and tilting. We also discussed thick and thin lines, along with dark and light value.

The students did a great job with their one-class-period project. It was great to see them overcome challenges and limitations. I love projects that require them to think creatively!


One table of students decided to join their pictures together to create a larger letter "I." I had to place it sideways on the bulletin board due to space, but it was fun to see them initiate the collaboration and work through the problems it presented. Scroll back up to see their work!

Sunday, August 28, 2011

In Situ

The poster is here!

It arrived on my second day of art classes (fifth day of school) and is perfect for the space. The first few art classes learned about the expectations by looking at a digital copy on my TV. It was great to see their excited faces when the walked into art this week and were greeted by the large poster.

As you can see, I decided to move the character traits for each month to the engaged column/support piece to the right of the poster.

In the past, this space was empty or contained random funny pictures of myself and the music teacher. Now the character traits have a new home and the column has a purpose, which freed up the space above my board for...


an art history timeline! I know you can buy pre-made timelines, but (personal opinion) they're ugly. Please send me a link to one that is visually appealing and able to be understood by students sitting in the back of the room. (I don't actually have any pre-made poster in my room. I custom-make everything either by hand or have it printed locally from my graphic design. I'm just too picky!) So I've never had a timeline before, nor have I ever wanted one. (Two years ago, when I taught AP Art History for the first time, I didn't use my classroom, otherwise I might have thought about having a timeline then...)

Right now, the timeline is fairly empty. I placed a few familiar images from the book Art is... along the timeline, since all my students read the book on the first day of class. I also added four images from Mesopotamia that we studied in detail in AP Art History. On Monday, we begin Egypt, so we will start to incorporate those along the timeline. As various elementary classes look to art of the past, I will also add those images to our chronology.

I messed with the scale, labeling every 45 cm but changing the time increments (jumping large amounts of time for ancient art and making more divisions for recent time periods).

You can see the artmaking process posters to the right of my board, next to the TV. If you look carefully, you'll notice a new purple poster to the left of the board. I was inspired by different art blogs and pinterest pins to create an "I'm done. Now what?" display. My sketchbook this year has various extra-time activities. With this new display, I can change out the options each class, giving the choice of up to three different activities (free draw, free read, artist statement, my artist list, drawing squares, coloring pages, etc.).

Right now, I'm addicted to fonts, especially new ones from dafont.com and Kimberly Geswein. She's a friend of a friend and worked at one of our sister schools. I'd take up her offer to make my handwriting into a font if I actually liked my handwriting...but I don't. One of the reasons I print everything with fun fonts.

Another reason I love creating my art displays digitally---being able to mix and match fonts! Some favorites are Grobold, Aubrey, Bauhaus 93, Broadway BT, Designer Notes, Paper Cutout, Complete in Him, and Loved by the King. Plus, I've loved Avant Garde and Century Gothic for a few years now.

But the mixing of fonts, my recent obsession.


Saturday, August 27, 2011

Art is...

Ever get a GREAT idea, only to find out you're not the first one to think of it?

I recently taught about Western art education to a group of local Chinese teachers. A post for another time. I stressed the importance of problem-solving, critical thinking, and originality in art, not copying the teacher. There's much more to be said about this training, but I told the teachers about a Saturday morning cartoon that I will never forget. It was a little blurb from Aladdin's Genie challenging the idea that great minds think alike. Instead, he would change the phrase to great minds think for themselves.

So while I don't think my ideas are that unique, amazing, or original, I still pride myself in thinking for myself. Something about American values of individualism and charting your own path that has been engrained into my person from my upbringing, including Saturday morning cartoons. Sure, I'm inspired by everything in life, but I'm less likely to copy a lesson, bulletin board, or activity exactly. And a lot of my ideas, they come from my own mind, combining various things I've seen online, in books, at another school, or completely unrelated to art education. Yet over and over I see that there is nothing new under the sun.

In my first year of teaching, my friend Miss Emily told me about her third grade painting lesson, based on the artwork of Wayne Thiebaud. I'm not sure where she got her idea, but between my first and second weeks of teaching the project, I found an almost identical lesson in a six year old copy of School Arts magazine!

Now this year, I was so excited by an idea that came to me in the middle of my first art class. Less than 24 hours later, saw it on a list of 20 Creative Bulletin Board Ideas for Art Teachers. So I guess it's not original, but it was a great first day of art class activity.


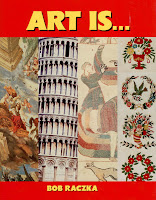
For all my classes, except for that first group of 5th graders, I welcomed them to the art room, then passed out a piece of paper, cut hotdog-style, that had "Art is" printed on it. The students could finish the sentence any way, with as many or few words as they needed, and decorating however they saw fit with crayons, markers, and colored pencils. After they worked for a while, I let students share their sentences, followed by reading the book Art Is... by Bob Raczka. (I turned the book into a Prezi to make it easier for the students to see the pictures.) We then went over art class expectations and created namecards for my job pockets.

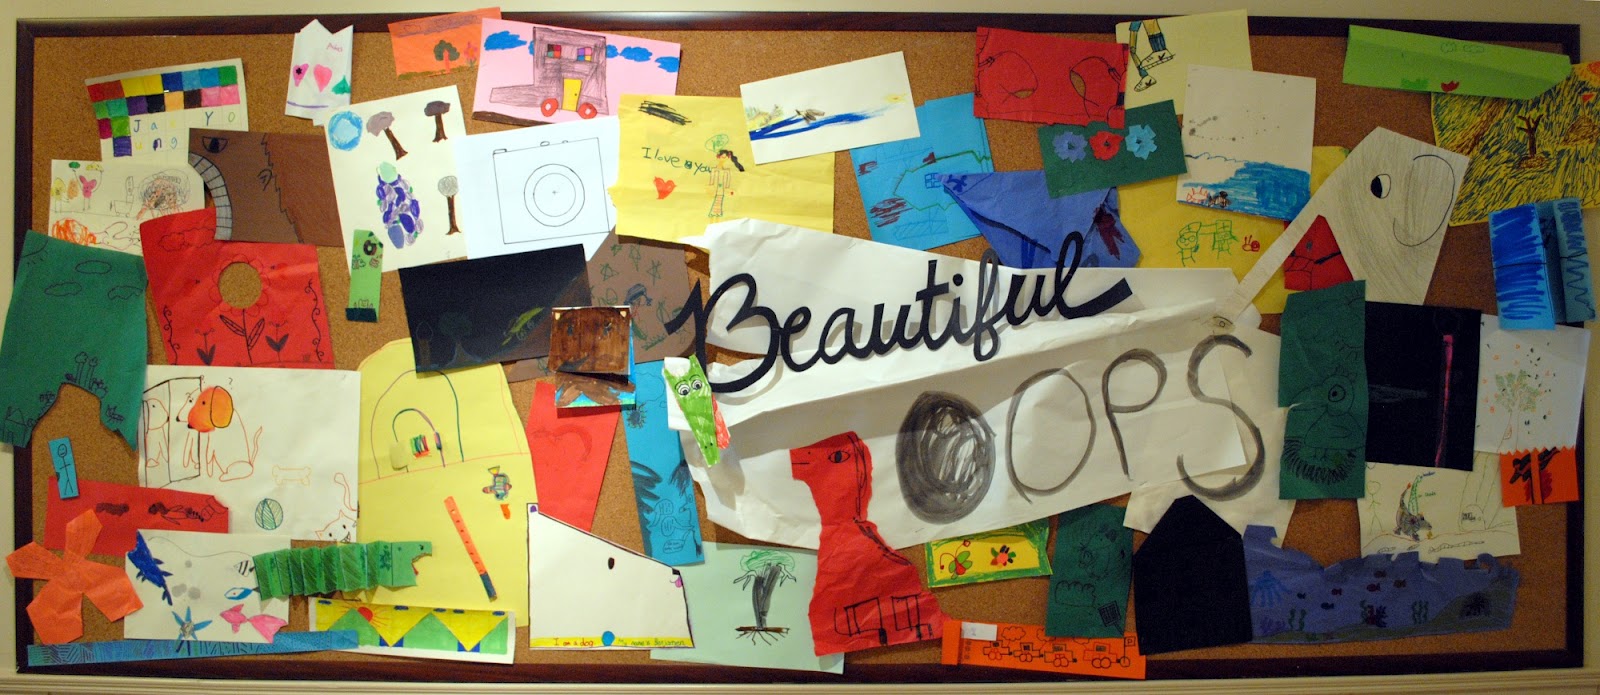
To display the work, I created a custom-border with the lines from the book.


I love their answers.  One boy wanted a second piece of paper and attached his two answers. 
"Art is droling (drawing). 
Art is lerneing (learning)."


Of course, art is fun, fun, fun, fun, and funny.

But did you also know it's boenqshrs?

It is also: amazing, magical, a great subject, my favorite subject, good, bad, cool, nothing, fear, difficult to me, even fun, color, drawing magic, beautiful, creative, fantastic, unusual, great, pretty, perfect, m&m...

Finally, as the book says,
"Art is how artists get you to think."


So the moral of the story: Think for yourself, realizing that someone else probably already thought of it. But it's about the process, not the product, so still do the thinking.


boenqshrs is 1st grade spelling and mirroring of letters for doing (boen) pictures (qshrs).


Tuesday, August 16, 2011

Friendly Facelift


Our cafeteria got a facelift, just in time for the new year! The bottlecaps were installed the day before school started. It was a great surprise for the students at lunchtime---seeing their artwork up on the wall! The kimbap was created by elementary students. High school students worked on the taco, with a lot of work being finished this summer by the secondary art teacher.

As you can see, there's a few gaps and areas needing touch-up, but I am thrilled with the result! Now to plan the coordinating mural for the right side of the cafeteria. I'm thinking pizza and dragon fruit...


In addition to the bottlecaps, I managed to get some paint up on the walls. While our facilities manager was out of town, I convinced his assistant to paint the columns in cafeteria. I was inspired by a picture of another school cafeteria that I found while looking for design ideas for our new Early Childhood Center.

When the facilities manager returned, he asked me if I painted the columns. I said "Well, I didn't physically do the painting, but I might have suggested the colors." A few days later, I heard him tell the Early Childhood Center Project Manager "If we build it, she will paint it." I had to laugh and smile, both at the concept and at the Field of Dreams reference.

Student Services retooled their Welcome and Goodbye boards from a less-traveled hallway to now go under the bottlecap display.  Overall, the cafeteria looks so friendly and fun!  Much less institutional...and more like a space for students!

I take an added interest in the cafeteria because my classroom is directly behind the bottlecap wall. I love to wander the cafeteria at lunch, sitting with different students, chatting, and eating lunch. This year, I am free during all three lunch periods which allows for extra socializing! And after three years of teaching, the middle school is now full of my former 5th graders. Middle school lunch is such a treat, seeing all the friendly faces of my former students.

The cafeteria is also the location for the art gallery portion of the Elementary Fine Arts Gala. The colored columns will alter the all-white gallery space, but I'm sure the splash of color will work in our favor.

Saturday, August 13, 2011

Another new display


It's off to the printer!

The poster depicts class expectations based on the kid-friendly version of our Expected Schoolwide Learning Results (ESLRs). Unfortunately, I won't have my new "rules" ready for the first day of art class, at least for the classes that come on Monday, but I'm excited to see the final result. It will be about 1 meter wide and just a little taller than that. This is the first thing I will have gotten printed for my classroom! Banners, teeshirts, mugs---my designs end up all around my school and on my students, but this is new territory. At less than $10, I might be getting a lot more custom posters for my room.


By the way, purple is underrepresented in my rainbow room, thus the tone-on-tone purple poster.


The background image (ESLR MAN!) is compliment of our curriculum and professional development coordinator. In preparation for our WASC accreditation visit last spring, she analyzed how we utilize (or don't utilize) the ESLRs as a part of daily school life and learning. The ESLR icon was born as a way to visually identify the ESLRs at play in school. We joke about ESLR stamps, temporary tattoos---you name it, we've suggested it.

I took the icon and added stylized labels of our five ESLR categories, and then she and I attacked our campus with the icon last semester. We stuck ESLR MAN! next to bulletin boards, plaques, student work---anything that demonstrated achievement in one of the five categories. The goal was to help student and teachers see how they were already working towards our ESLRs. And now ESLR MAN! has found his way into the background of my classroom EXPECTATIONS...


In case you were worried, I haven't gotten rid of my "Awesome Artists" poster. I moved it to the back wall of my room, above the construction paper. I still plan on referring to it and discussing ways students can be "Awesome," but for this year, the focus is personal; In art class, I will try my best to learn and not give up.

Search This Blog

Total Pageviews


  © Blogger template Shush by Ourblogtemplates.com 2009

Back to TOP